
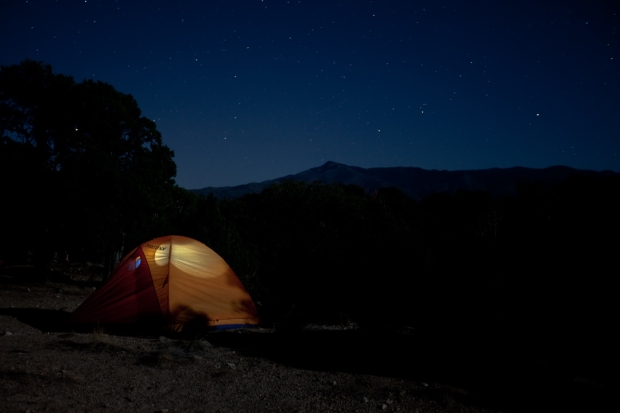
Camping on the Rim
As a photographer, I plan many distant location shoots throughout the year. Some I drive to and some I fly to. Either way, I choose to forgo the luxury of hotel living and choose instead to camp. Over the years I have gained a bit of practical knowledge and earned some experience, albeit trial and error may be my best teacher, about how to pack light for these trips. So, I thought I would share some of what I have learned here in this post. Because the expeditions that require air travel are generally much more challenging from a gear perspective, I figured that I would write a blog post that lists the gear that I have selected for this upcoming trip and some details about their use and selection.
Even for the most adventurous outdoor explorer and photographer, camping is a lot of work. As with anything that requires a good amount of effort, the rewards are tremendous. While on an expedition that is far away from home, spending the entirety of your time in the outdoors means just that, you are outside the entire time. While you have the opportunity to marry yourself to the landscape and become intimate with your natural surroundings for a few weeks, you are also required to accept what ever Mother Nature throws at you.
Traveling to a location where the weather is expected to be very warm to hot during the day and then change to cool to cold at night can be especially challenging. Such is the case with photographing the American southwest during springtime in the high desert. My approaching trip to photograph the emerging wildflowers at the middle and higher elevations requires me to give a bit of thought to the clothing that I will need to not just survive, but to ensure that I am quite comfortable.
Because I will be traveling several thousands of miles to arrive at my chosen shooting location, and I have only a couple of weeks to shoot, I will be leaving on a jet plane! This presents an added challenge to gear selection as money is always an object and I like to save! Therefore, I need to pack in a manner that my checked luggage is under the size and weight requirements that trigger the outrageous airline baggage fees. Generally this means that I check a duffel bag that is under fifty pounds. I use either a High Sierra 28-inch wheeled duffel bag or a The North Face Large Expedition Duffel bag, depending on the location and the elements that I expect to encounter.
Here is the complete gear listing with details following.
Camera Equipment
I did not list my camera gear here, as everyone’s camera equipment is different. You already know what you like to shoot with, so just insert those items that you use here!
Photography Expedition Packing Guide For Air Travel
Other Equipment
Ipad
Iphone
Ipod
Charger Cable for I devices
Apple Camera Connection Kit
Earphones
Motorola Walkie Talkies
Delorme GPS w Spot Communicator
Solar Charging Panel w Battery Pack
Notebook w Pen & Pencil
Camping Gear
High Sierra Wheeled Duffel Bag
Kelty Black 50L Hiking Pack
Northface Black Back Pack
Nemo Tent
Sleeping Pad
Summer Sleeping Bag
Large Gerber Knife
Swiss Army Knife
Cricket Folding Knife
Short Bic Lighter
Long Bic Lighter
Small Coleman Lantern Fuel
Small Coleman Lantern LED
Large Mag Lite
Small Mag Lite
Solar Shower (3)- 5 gal capacity
Lashing Straps
Hiking Poles
Head Lamp
Back Country Chair
Aluminum Water Bottle (2)
Small First Aid Pack
Large Bath Towel
Washcloth
Sea to Summit Dry Bag
Cooking Gear
Kitchen Cloth
Silverware Set
Cookware Set
Yellow Plates (2)
Primus Pot w French Press
Small Iso Butane Stove
MSR Stove w Bottle
Cutting Board
Wooden Spoon
Coffee Mug
Tongs
Wash/Rinse Blue Bucket Bags
Gallon Size Zip Lock Bags
Quart Size Zip Lock Bags
Clothing
Ditty Bags
Kavu Orange Hiking Hat
Marmot Beanie Cap
Headband
Work Gloves
Asolo Hiking Boots
Keen Sandals
Flip Flops
Socks
Underwear
Under Armor Dry Wick T-shirt SS 3
Under Armor Dry Wick T-shirt LS 1
Columbia Dry Wick Warm LS Red
Under Armor 2.0 Comp. Top & Bottom
Shorts- Columbia Light Weight
Shorts- Cargo Camo
Pants- Columbia Cool Creek Dry Wick
Pants- Columbia Passo Alto OmniHeat
T-Shirt- Prana Lightweight Orange
Button Up LS Prana Lightweight Shirt
Fleece- Columbia Green
Jacket- Columbia Blue Soft Shell
Toiletries Bag
Descriptions-
Other Equipment
Ipad
This handy device is really only used for entertainment while on the airplane. I use the flight time to catch up on some photo magazines that I have downloaded using Zinio. I use the Photographer’s Ephemeris App quite extensively. If you are not familiar with it, check it out. It is an amazing and indispensible app for any outdoor photographer!
Iphone
Of course you need your cell phone! I primarily only use mine while traveling to call my girlfriend each evening to learn about her day and share some of mine. Yes, I do prefer it when she accompanies me, which is most of the time. In that case, I just use my phone when I need to know what time it is.
Ipod
Tunes! You gotta have em’! I predominately listen to Reggae and enjoy some down tempo/ lounge stuff at night.
Motorola Walkie Talkies
Communication is very important. Cell phones most often do now work very well when we are in the field in most of our backcountry locations. And since you NEVER hike alone, and you really should maintain good communication with your partner, a good set of walkie talkies are just the ticket!
Delorme GPS with a Spot Communicator
Again, good communication is key when it comes to personal safety. The Spot can send a satellite signature to first responders giving your exact Lat and Long location address. If you get hurt in a remote area, the helicopter is only one button away.
The GPS device is loaded with maps of the location of our shoots. We use this little gadget to know how to get there, mark our location for further reference, and keep from getting lost.
Solar Charging
Goal Zero Nomad 7 Solar Charger. Get one. Remember there are no hotels and you may not always have the rental car charger handy when in the field. Photography now a days require some battery juice. OK, a lot of battery juice. I carry six camera batteries with me in the field and this solar panel keeps them juiced up. And the phone to!
Camping Gear
A lot of this stuff is pretty self explanatory, so I will try not to bore you. The manufacturers of the gear in this department are pretty important. I tried to list the make and models of the gear that I use in an effort to show you what works well and works for a long time. When choosing gear, the cost is always a consideration for me, but so too is its value. I use my gear all year round, for hundreds of days. If you go only once or twice, then the cheap stuff is fine.
I use a good duffel as my checked bag. A good quality duffel is critical here as the airline baggage handlers will do their absolute best to ruin it for you! This duffel also serves as my base camp organizer for clothes and equipment. I keep this bag in my tent, so I never ever pack food in it.
Kelty 50 liter Hiking Pack
I use this bag as my carry on luggage. It fits perfectly in the overhead bins and you can pack quite a bit in it. When I get to base camp, this bag is repacked with the items that I will need for backcountry treks. A good bag is critical here as well. The bag needs to be of good build quality, but more importantly, it needs to fit you well! You will be attached to this thing for many, many miles. Comfort is King!
The North Face Optimus Back Pack
This bag serves as my personal item that I carry onto the plane. I use this bag to carry my photo equipment. I can wear this pack on the front of my body (like a baby carrier) while my larger hiking pack is on my back. This pack will fit under the seat in front of you and gives you easy access to things like the Ipod and Ipad, etc. while keeping the expensive photo equipment (camera and lenses) with you at all times.
Nemo Tent
I typically use a Marmot 2 person tent because it is small and light. With one person and gear, it can feel a bit small. I had some room to spare in my bag so I decided to go five star for this trip and take a 3 person tent. This will give me some additional room to move around in, which is a luxury.
Sleeping Pad and Sleeping bag
This is totally personal preference here. I don’t require much in this department because once I fall asleep then its literally “lights out”! My only requirement is that the bag keeps me warm. I use Marmot sleeping bags because the bang for your buck is great! Not too pricy, but great quality. I use down bags because they compress down to a very small size and weigh very little. I use a folding Zmat by Featherlight. It is a minimalist pad that gets the job done, but I would not mind something a bit more posh!
Solar Showers
They are awesome. Just fill them up, place in the sun for a few hours and you have hot water. I am using three of them with five gallon capacity each on this trip. Perfect for taking a shower, washing my clothes and cleaning the dishes.
Lashing Straps
Indispensible. Grab a few of these and keep them in your pack. I use them to create a clothes line, for hanging food from a tree (in bear country), hanging a lantern, attaching things like a sleeping bag to my pack, for tying back branches, and much more.
Hiking Poles
I use these on every hike. Once you start using them, you will never hike empty handed. These poles offer great stability, especially on rocky and steep descents. I recommend a really good pair. I use the Black Diamond men’s aluminum poles.
Back Country Chair
Yes, this is a luxury item! It is a small, very light weight folding chair that easily fits in your hiking bag. It is a great item to have when you reach the top and go for celebratory summit beer! Of course, sitting and waiting for the right light is much nicer in a chair as opposed to the ground.
First Aid Pack
Because you don’t leave home with out it!
Washcloth and Bath Towel
Two weeks in the wilderness should definitely be interrupted a few times with a shower.
Cooking Gear
This category is pretty straight forward. Cooking utensils are a must, but should be kept rather simple. We actually cook pretty well while we are out. The MSR stove that I use is a great piece of equipment. It works using a variety of fuels, but I try to stay with using only the white gas because it burns cleaner. I use a Primus pot that includes a French press for making coffee in the morning and for boiling water for cooking. I have an REI cookware set that consists of two pots and two pans that have been going strong for many years. I have two collapsible bucket style bags that I use for washing dishes and doing laundry. One is for washing and the other is for rinsing.
Clothing
This may be the toughest category of gear to pack. I try really hard to keep it simple and take only what I will need and no more. I pack the clothing in my carry on bag so that I can save space in my checked bag for the other gear. When I pack my clothes, I organize the items into separate ditty bags to compress them to the smallest size possible. One bag for underwear, bag for shirts, etc.
Because of the temperature shifts between day and night in the high desert, I really need warm weather clothes for the day and cold weather clothes for night. This could really make for having to take a lot of items in order to have two different wardrobes, but not necessarily. One trick that I have learned is to wear the heaviest clothes on your body while traveling. This frees up space and weight in your pack and you really don’t get them dirty on the plane. For example, I will wear my hiking boots on my person and pack the Keen sandals. I will wear a t-shirt, a button up shirt, and the fleece. If it is not too warm, I will also wear the jacket.
In order to stay warm at night, I am bringing compression gear. I can put this additional layer on under my other clothes to give me a great amount of warmth. The Omni-Heat soft shell pants, the fleece and the soft shell jacket will pretty much be worn each night and should take care of me just fine. I don’t use cotton shirts because when they get wet they are just miserable to wear and take forever to dry. I use Under Armor Dry Wick shirts that are a blend of polyester and some other man made material. They are very lightweight, compress well and I can sweat in them all I want and still feel dry. I generally will take two or three short sleeves and one long sleeve. I am packing two pairs of shorts. That way I can wear one while the other is drying out after washing. I am taking two pairs of lightweight pants for the same reason. I will only have to pack one pair, because I will be wearing the other pair on the plane! You may notice that I am a fan of Columbia clothing. For outdoor clothing value, you just can’t beat Columbia.
To keep the sun at bay during the day, I wear a Kavu wide brim hat. It is bright orange and makes me look like a rice farmer, but it works to keep me cool and dry when it rains. I am taking a beanie cap to wear at night in case it gets really cold. The work gloves are the Mechanix brand leather and nylon medium duty gloves. These are great to have while gathering firewood, and doing general campsite chores. They are also nice to have while hiking in rough terrain where you may have to do some scrambling.
This may just be the longest post that I have ever written. If you made it this far, then I suppose I did not bore you to death. Hopefully some of this information was new and helpful. I think that the best way to capture wonderful outdoor photography is to get outdoors and stay there. It is always so nice when shooting late into the night to be able to jump into your sleeping bag to catch some ZZZ’s rather than getting into the truck and driving back to the hotel.
Good Night Yall! (zzziiippp)
